I'm catching up on a posting backlog dating back over a year. It all started on the 4th of July weekend 2012 with removing the old batteries:


Next, I built the front box. It holds 30 cells, and fits inside the original front rack:

I welded a new front upper rack. Because lithium cells are lighter, I used 1/8" thick steel rather than the 3/16" of the old lead-acid racks and boxes. I originally was going to replace the front rack, so I built a new rack for the bottom. I decided later to just use the existing front rack, and flip the whole rack so that the "bottom" becomes the top - this will be detailed in a later post. Here is the completed rack:

I then created the battery box box from polyethylene, 1/4", natural color. I started by cutting a single piece which covers the bottom, front, and back of the box. The piece is then "V" grooved so it folds. This starts with marking the path where the groove should go, and then clamping guides for a router to cut the path:

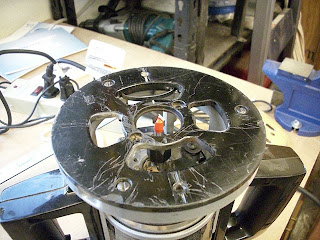
Here is the router, showing the "V" groove bit in place:
With the correct bit depth (not quite all the way through the plastic), it is a simple matter then to run the router between the guides, creating a nice straight groove:

Here is a test fit of the rack on the box, to make sure it fits:


And that's what I got done on that weekend. I also threw my back out as a result (what a drag it is getting old) which put a crimp (heh-heh) on further progress for over a year...

I also pulled all of the racks and cabling, since I'll be replacing the cabling (with orange high-flex 2/0 gauge welding cable), and refurbishing or replacing the racks:

Next, I built the front box. It holds 30 cells, and fits inside the original front rack:

I welded a new front upper rack. Because lithium cells are lighter, I used 1/8" thick steel rather than the 3/16" of the old lead-acid racks and boxes. I originally was going to replace the front rack, so I built a new rack for the bottom. I decided later to just use the existing front rack, and flip the whole rack so that the "bottom" becomes the top - this will be detailed in a later post. Here is the completed rack:

I then created the battery box box from polyethylene, 1/4", natural color. I started by cutting a single piece which covers the bottom, front, and back of the box. The piece is then "V" grooved so it folds. This starts with marking the path where the groove should go, and then clamping guides for a router to cut the path:

Here is the router, showing the "V" groove bit in place:

With the correct bit depth (not quite all the way through the plastic), it is a simple matter then to run the router between the guides, creating a nice straight groove:

Here is a test fit of the rack on the box, to make sure it fits:

And here is a test-fit of the cells. I was originally going to use threaded rod to retain the cells in place, but it turned out to be impossible to get the rod through the sides when the rack and batteries are in place. But the test-fit was with the threaded rod:

And that's what I got done on that weekend. I also threw my back out as a result (what a drag it is getting old) which put a crimp (heh-heh) on further progress for over a year...

No comments:
Post a Comment